Author: matthewd (Page 2 of 2)

EdTech Weekly Response Five

This week we looked at the Pacific School of Innovation and Inquiry with Jeff Hopkins. PSII is an alternative school in which students focus their time on projects and inquiry based on what they are interested in, rather than sitting for 4-5 periods a day being lectured in a regular high school. The students here, despite not learning in the traditional way, do better on average in mathematics, science, humanities, etc. Though despite the success over the past years, I do not believe their style of teaching will become wholly adopted, rather, some parts of what and how they do things will be taken and weaved into the public school system. This may include things like their focus on inquiry-based learning for certain subjects or classes, with other traditionally taught classes. I do also believe, however, that for certain students, PSII’s style of education may work better.

Another school like PSII is The Victoria School for Ideal Education. VSIE is a k-8 independent school with small class sized to maximize the amount of time the teacher can spend with each student. Additionally, they incorporate meditation into their daily schedule to help the students with their mental health, memory, academics, etc. Finally, VSIE ensures that they nurture their students understanding of the world and environment around them.

Drunken Apple Pie

Hello!

For week three of my Baking Adventure, I decided to make Drunken Apple Pie!
“oooooo” the crowd says, Well fear not! For I shall tell you how I made it!

As always, to begin I will talk a little about myself and my mental health. I have been a little more anxous this week about school since a lot of things are coming due at the same time, though once again, through baking I have been able to let that all go for a few hours while I make a delicious treat.

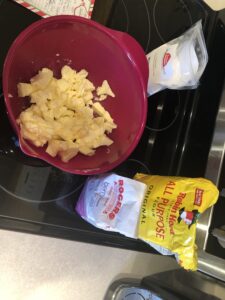
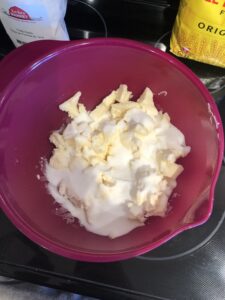
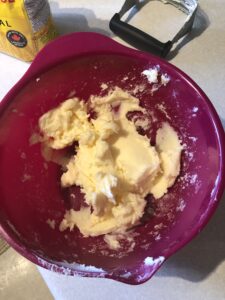
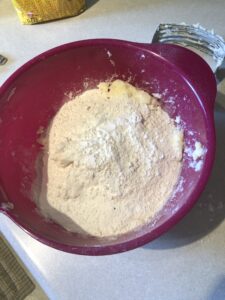
I have made a few pies before, but I have never made the crust by hand before, so this was a whole new challenge to me. To start, I laid out all my ingredients on the counter and started with the crust. I first cut two and a half sticks of butter into hald inch squares and placed them into the freezer as per the recepie. I then mixed the flour, sugar and kosher salt together. It was then that I realized that I don’t have a large enough food processor with the right attachments to make the dough, so it was time to break out the pasty cutter and get to work! I then added the butter and began to mix.

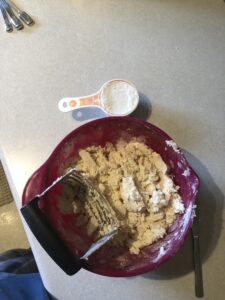
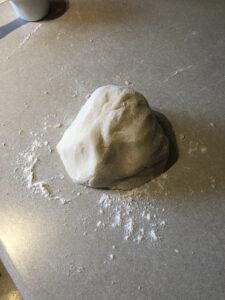
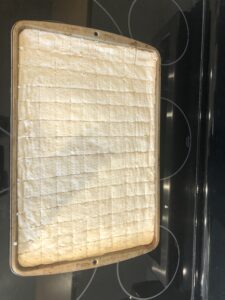
After the butter is well mixed in, you beging to slowly add iced water and mix until you are able to shape the the dough into two small disks and then wrap in plastic wrap.
IMG_0284

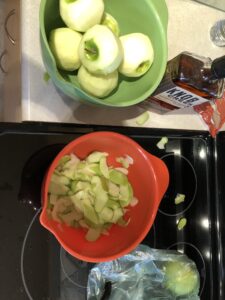
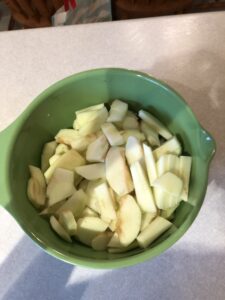
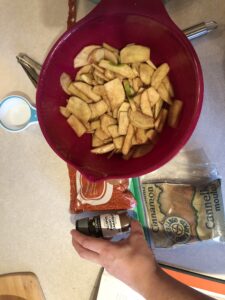
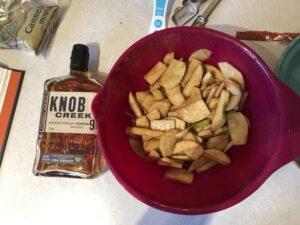
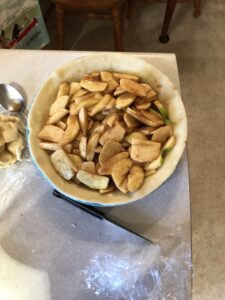
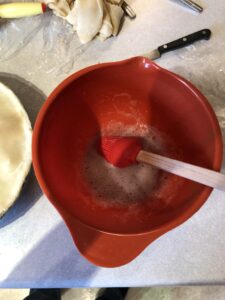
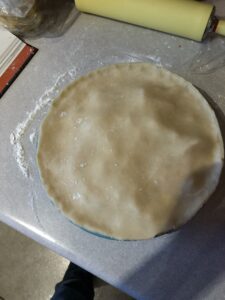
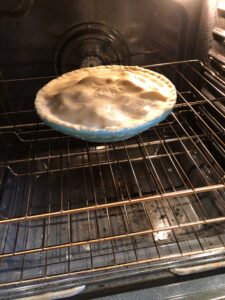
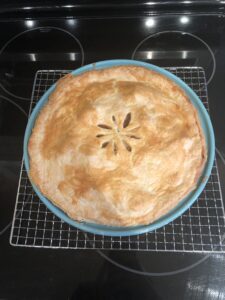
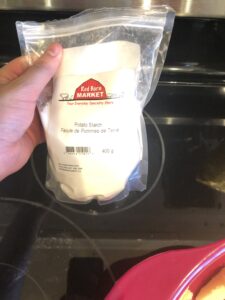
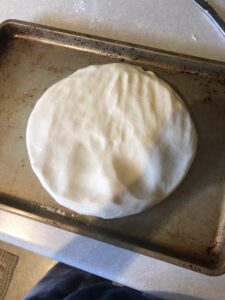
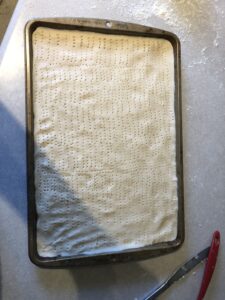
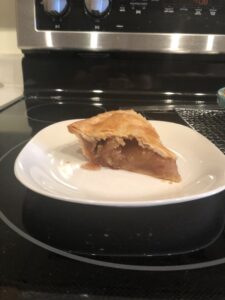
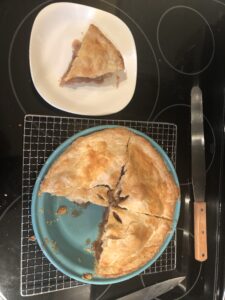
After I had made the dough and placed it in the fridge, I realized that I did not have a pie dish anywhere in the house, so I went and picked up a ceramic one from Penna & Company at Broadmead Village. When I got home I got to work on making the filling for my pie. I started with peeling and coring my eight granny smith apples, which took a lot longer than I first expected. After this I cut them into slices, and mixed together the spices for the filling. This included sugar, potato starch (I didn’t have any cornstarch so I used this instead), cinnamon, allspice and nutmeg. Put this in a large mixing bowl, added my sliced apples, then poured one oz of my Knob Creek Burbon overtop. I then tossed the apples in the mixture until they were evenly coated. Now, this is where I made my mistake. I had forgotten to take the pastry dough out of the fridge before I started my filling, so it was as hard as a rock. As a result of this, I had to wait for a bout 30 minutes for the dough to warm up enough, and the sugar and alcohol began to break down the apples a bit and draw out a lot of the moisture from them. So instead of having very well coated apples, I had somewhat well coated apples and a bunch of liquid in the bottom of my bowl by the time the dough was rolled out. At any rate, I rolled out my dough into two thin sheets, placed my bottom layer and trimed the excess, added my filling them placed my top layer of pastry and trimmed that. I then sealed the dough with an egg wash and crimped the edge with my finger, put some slits in the top layer to let the steam out, and placed the pie into my oven, pre-heated to 425 degrees. After 15 minutes I reduced the heat to 375 and baked for another 45 minutes. After the time was up I removed my pie from the oven and set it on a rack to cool. After about an hour and a half it was cool enough for me to cut myself a piece. And let me tell you, it was delicious!

Thank you all for reading anoter entry into my baking adventure, I shall post again next week with another delicious goodie!

EDTech Weekly Response Four

I quite liked the sketchnoting and the chapter on “Applying Multi Media Principles,” as pictures always help me connect information to something more than just words, or to real world examples. Now, I personally don’t doodle, and I am terrible at drawing, though if necessary I try my best. Though since I am not a person that likes to doodle, doing sketchnotes for everything would take away from my note taking. However, for certain things I do believe that I will try to doodle a picture if I think it will help me remember some information. Though along with this, I do hope in future to work this into my teaching and encourage my students to draw a small doodle about things they think is important or concepts they need or wish to remember.

In regards to the article on using words and graphs, I wholeheartedly agree that so many people, when doing a presentation, have pictures that in no way work with the words that are on screen, or only partially relate.Though the article says to inset pictures at the same time as writing your points, so not only can you find a picture that fits what you are saying, but you can also slighty alter what you are saying on the fly! For example, let’s say I have a point I want to talk about, and a picture I want to use, well if I’m inserting the picture while writing out my point, I can then change what I write to better match with the picutre.


Photo by airfocus on Unsplash

Scottish Shortbread

Hey again!

I’m back again for my second post in my weekly baking adventure. This week I made Scottish pan shortbread, the receipe I used, I was given by my Grandma.

I am not as anxous about school, though my mental state for this week is a little worse than this time last week. This is resulting from the sad news that a good family friend had passed, so that event has been weighing on me since I found out. Thankfully, as was the case last week, I put on some music, and for eth time it took to make my shortbread, I did not think of anything but what I was doing in the moment.

Making pan shortbread can be quite difficult. To make it, you must first cream a cup of caster sugar into a pound of butter, Once it is fully mixed in, you then mix in three cups of flour, minues three tbsp of flour and add three tbsp of potato starch. After it is mixed in, you take a fourth cup of flour and mix in just enough so you can remove the dough from the bowl and kneed it. You must kneed the dough for around ten minutes, or until it is smooth enough. This will be figured out after making it a few times. While kneeding the dough, the fourth cup of flour should be used to keep the dough from stickign to your hand and the counter, though it is not necessary to kneed in the whole cup. Once the ten minutes is up, or the dough is smooth enough, the dough must then be spread out by hand into an 11/15 inch cookie cheet or jelly roll pan. If you dont have a pan exactly 11/15, whatever you have closest to that size will do. This is the most difficult part, as the dough must be spread evenly across the entire pan to avoind uneven cooking. Additionally, if you push too hard on the dough, you may overwork it and cause the end product to be very overly dense.  Another thing that makes this dessert difficult is that it must be in the oven for 40 minutes, anywhere from 250-300 fahrenheit, and as every oven is different, you need to figure out what temperature in that range through trial and error. After the 40 minutes, you take the shortbread out of the oven and press lightly in the centre, and it should spring back. If it does spring back, you take a knife and clut it into pieces while it’s still hot, as if it is allowed to cool down it will crumble and fall apart whe you try to cut it while cool.

The end product turned out very nice. One of the better batches that i’ve done, though there is still much room for improvment. In another 10-20 years I might be able to make it as well as my grandma could. Hopefully!


EDTech Weekly Response Three

In this week’s class we covered various multimedia platforms, of which, the ones I enjoyed the most were openshot video editor and screencastify. For openshot, it was nice to see another free video editing program that works, even if it’s a tad clunky and hard to learn. Though it may be easier for younger students to learn how to use it compared to myself, since new programs like openshot can take me a while to learn. One thing about the program that I liked, was the fact that once your videos were uploaded to the program, it was easy to begin editing them, though it was very easy to try accidentally drag a clip vertically to a whole new line, rather than horizontally on the same line. Apart from that, it is a decent program that I think I may use in my class one day.

Screencastify is an extension to google chrome that allows you to record your screen, whatever happens and records your voice, if you give it access to a microphone. I like this program because it is an attachment to your browser, rather than having to run another program in the background to capture your screen. I also like the fact that when you end a recording, it automatically opens a small window where you can watch it back and choose to either save it or delete it. If I need to do any screen capture, I will consider using screencastify because of it’s ease of use.

Espresso Panna Cotta

Hello all!

Today I made espresso panna cotta.

First off, my mental state recently has been stable, with only a minor amount of anxiety, though I have been quite stressed out with many things being due at the same time. While making my panna cotta, I forgot about everything to do with school, all stress was lifted from my shoulders and I was completely engrossed in my baking. Though, as when making panna cotta and a brittle timing is everything, and it is very easy to burn things, so it was a little stressful.

The whole process went smoothly, though I was unable to procure hazelnuts, so I had to settle for walnuts for the brittle. Additionally, here in Canada you can’t get double cream, but you can use whipping cream as a substitute and you can’t get leaves of gelatin, but the conversion is three gelatin leaves per one tbsp. pouch of gelatin. I started by making a pot of espresso in my stovetop espresso maker, then when that was done, I measured out all my ingredients and began to mix and heat the cream, whole milk, espresso and caster sugar on a medium low heat. While this was heating up, I turned on the oven to toast the walnuts and put a cup of caster sugar in a pan to start creating the caramel. Now, at this point there are three things going on, all of which need to be watched very closely as all can burn very quickly. As things were heating up, I prepped a baking sheet with a silicone mat to pour the eventual caramel, cinnamon and walnut mixture on to cool and harden. Once the caster sugar had completely turned to a liquid, I added the cinnamon and walnuts and mixed it together. I then poured it over the silicone mat to cool and harden. It was at this point I almost forgot to check on the mixture for my actual panna cotta, so I quickly pulled it off the heat and added the gelatin. Once the gelatin was dissolved, I poured the mixture through a sieve into a bowl to filter out any lumps, and there were a few. From here I used a ladle to transfer the mixture into a silicone muffin tray, put it on a wire rack and placed it into the fridge to set. After it had began to set, I threw it into the freezer to speed up the process. After a couple hours it was all set and I put one on a plate, placed some walnut brittle around it and dug in!

The panna cotta was very rich and smooth with a nice coffee taste. The espresso really starred in the flavours. The texture was quite smooth with no lumps. My only complaint is that I can’t eat more than half of a serving as I am lactose intolerant!

I hope you enjoyed reading my experience with making espresso panna cotta! Check in next week for another treat!


EDTech Weekly Response Two

In this week’s class, what stood out most to me was the conversation about appropriate use of technology in the classroom, rules about taking photos of students and proper online presence for teachers outside school.

For tech use in the classroom, it was a bit of a surprise to me that for a teacher to use an online education program, they must first get consent from the students’ parents before using it to instruct their kids. Also, that the servers used to host the program, needs to be located inside Canada. While this surprised me at first, with later thought it made more sense, as if I were a parent, I’m not sure I’d want my child’s schoolwork and grades be located on a server in the US.

Regarding photos of students, all photos should be taken on a school owned camera/device, not on a personal device, as a teacher could easily upload those photos to the internet without anyone knowing. This wasn’t as much of a surprise to me as elementary students are considered vulnerable individuals by law, and a person that is not a parent or guardian should not be uploading photos of them to the internet without consent and proof of where the photo is going and why.

The last point that stood out to me was about teacher presence on the internet. Teachers must keep a professional life on the internet as they are role models for young and impressionable people and if they do or say inappropriate things on the internet and a student sees it, said student may think such behaviour is okay. Teachers always need to be conscious of what they say, do or post online.

EdTech Weekly Response One

During this past week’s class, we talked a lot about the “Most Likely to Succeed” movie. What stuck most with me is when we talked about the teaching of many of the teachers at High Tech High and how it differed from traditional school. I loved the fact that they had a very unstructured approach to the students learning and letting them be responsible for their own learning and work is a wonderful way to prepare them for later schooling in college and university. Personally, I wish we had more of that in my high school as coming here to UVic and having so many independent projects is a little overwhelming for me. Though I am beginning to get a handle on it all. The movie also showed me that when I become a full-time teacher, I need to make sure I have faith in my students, faith that they will do their best, and learn from their mistakes to do better the next time around.

Newer posts »